Wednesday, June 24, 2009

Cause I'm Leaving On a Jet Plane

I'm headed to Seattle for a few days, but thought that before I left, I'd better clean out my camera and post whatever pictures I had of this week's work so far.

It has already been a busy week!  The pics below show the beginning of the roof replacement (right now they're just tearing off the old shingles & gutters), addition of new drywall (the kitchenette is pictured here), and installation of the concrete footers on the new south addition (thank goodness for the sunny weather, which is allowing them to get this done right away!).

More pictures when I return!

The old roof is gone!


A small portion of the old roof was left on (on the right) and will be replaced when they extend the roof onto the new addition.


Piles of discarded shingles.  Two small dumpsters were also filled!


Drywall is complete in the kitchenette.


The concrete footers are complete. 


Another view of the footers.

Wednesday, June 17, 2009

Scroll to Watch a Dining Room Be Built

No captions necessary.


That Pesky Sewer Line

Good, nay GREAT, news! Remember that surprise sewer line found running a few feet below what will be the foundation of the south addition? The one that didn't show on any surveys, doesn't belong to the city, and no one can find a record of, despite the fact that it services multiple greek houses? Well, we finally received permission from the city to replace the portion of the line running under the addition and build over top of it! This situation created a massive delay in the construction schedule (for the south addition, at least), but this news means that construction can finally commence on the south addition. Hooray!

On Monday & Tuesday, the line was replaced and the hole filled in. An inspector from the city was on site to make sure the work was done to their specifications, hopefully preventing other delays. Now that the line has been replaced, foundation work can begin for the south addition. It will take several days to build the foundation, then the addition will be framed up in about seven days. Pray, wish, cross your fingers, hold your breath (or whatever else gets you through the day) that we have good weather for the next 2 1/2 weeks so that the south addition work begins and continues without further delay.

The new sewer line runs under the gravel (grey area).  You can see where the plumbing from the house hooks into the new pipes (green). 


DG really is a giant construction zone these days.  Dump trucks, excavators, bull dozers, and  concrete mixers are regularly on-site, sometimes parked there for days while in use.  Here I've managed to get three in the same picture.


The green pipes mark the two ends of the newly replaced sewer line.  This will never in our lifetime need to be replaced again.  Good thing, since a house is about to be built over it.

Friday, June 12, 2009

How Many Pounds of Steel Does It Take...

You might be wondering (but probably not), "Rose, how many pounds of steel beams and counterweights does it take to support the DG house while a load-bearing wall is removed?"  Funny you should ask!  In fact, it takes 11,000 pounds of steel and 9,000 pounds of counterweights to properly support then very carefully and ever so slightly lift up the house to install a new support beam.  

On Wednesday, the exterior wall in the dining room that abuts the dining room expansion was removed.  In place of that load-bearing wall, a new support beam was added to hold up the house.  In the time between when the wall was removed and the beam was installed, the house was held up by scaffolding and very slightly lifted using a series of counterweights.  Basically, there was a whole lot of physics being applied in the house on Wednesday.  I've taken some pictures of the process to give you a sense of what it takes to support then raise the house a few millimeters while a wall is being removed. 

What's missing in this picture?


Support scaffolding in the dining room.


Scaffolding and counterweights (bottom of picture) in a second floor student room.


Some of the steel beams and weights before being installed.  If you're curious, it took 16 guys to carry the 20,000 pounds of materials into the house.  

Tuesday, June 9, 2009

Balloon Framing... and Why You Should Care What That Means

I've spent the last few days at the house learning about something I previously knew nothing about: how buildings are framed.  The reason this is coming up now is because we are getting ready to start framing the new dining room.  But before that starts, the existing dining room exterior wall has to be removed.  And here is where it becomes important that, in this case, I've been learning about the difference between how most houses are framed versus how Delta Gamma is framed - because of course DG just had to be different!  

Today, most houses are framed in such a way that the weight of the each story sits on the ceiling/floor that divides it from the story below.  In this situation (we'll call it "standard" framing), the four exterior walls of the house are built, then the ceiling is built on top of those walls.  If you want to build another story above, the four walls of the second story are built on top of the ceiling of the story below it, distributing the weight from the second story walls to the floor below them, not to the walls below them.  I've drawn a rough little sketch for you (below) so you can see what I mean.  Standard framing is outlined in the top half of the sketch.  Basically, as you travel up the framing of the house, you would see a pattern of wall, floor, wall, floor, wall, floor, etc.

However, DG wasn't framed using this standard practice.  Delta Gamma was framed in a style called "balloon framing,"  In this case, the second story walls were built on top of the first story walls, then the floor/ceiling in between the stories was built inside.  (See the bottom half of the sketch above.)  What this means is that the weight of the second story sits entirely on the walls of the story below.  In the case of DG, the weight from the roof, third story, second story, and first story is all transferred to the cinderblock walls in the basement and the foundation below.  Obviously, this presents a significant problem when you're talking about removing a wall, since all the exterior walls of the house, regardless of the story, are supporting all the walls above.  

Once the dining room wall is removed, a large beam and a column will be able to support the house above.  However, in order to remove the dining room wall and install the beam, a large section of scaffolding will need to be built inside the house to hold it up while the existing wall is removed.  In DG's case, due to the balloon framing, scaffolding will also need to be built in the second story rooms to support the third floor and roof.  I'll make sure to post pictures of the scaffolding in the next day or two.  For now, here are some pics related to the structural design of the house and the dining room wall:

Here you can see that the french doors, windows, and any construction not actively involved in supporting the house were removed in preparation for the demolition of the dining room exterior wall.


This is the area where one dining room ceiling beam (left) meets the beam running across the exterior dining room wall (top left to right). 


This is a picture of the wall in a second story student room.  The drywall above the window and the ceiling drywall were removed to see how the support scaffolding will need to be built.  Here you can see where the roof meets the second story wall (balloon framing).

Quick Pics

Demolition has pretty much stopped in the existing house and the bulk of the work being done these days is to start putting things together.  Some of this work doesn't look like much of anything.  For example, it takes a long time to run new electrical wires, but at the end of the day, really all there is to show for it might be some new outlets and switches.  Not much to photograph.  However, I've taken a few pictures of the most noticeable changes that have taken place. 

A new bulkhead (the long beam-shaped structure on the ceiling) was built in the formal to conceal the fire sprinkler system lines.  There are actually two in the room, which meet up with the french doors, providing symmetry while attractively concealing the lines.  They will be covered in drywall and painted to match the ceiling.


The new basement bathroom walls were framed on Monday.


Here you can see the framing for the shower stalls in the new bathroom.


The two bathrooms at the base of the basement stairs are now one space.  A block wall was built to fill in the second doorway and new sink, shower, and toilet units will be installed.

Wednesday, June 3, 2009

The Whole Enchilada

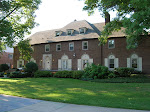
Several people have asked me: "What exactly is being done to the house?"  At first I thought I would post some of the architect's drawings, but I honestly don't think they will help that much, mostly because they can be hard to read, and also because I can't post on here drawings big enough that you'll be able to read them.  So I'll do my best to explain the work, both big & small, with a few pictures scattered throughout.

There are three major portions of the project:

1) Renovation of the existing house.  This includes new paint & carpet throughout.  Addition of fire sprinkler system.  Most rooms will continue to be used in the same way, though a few rooms in the basement have been repurposed.  Most notably, the existing chapter room will be made into more study space (so that every student will have desk space) and the two bedrooms in the basement will be converted to dorm-style bathrooms (with toilet stalls and shower room) and a bigger laundry room.

2) Expansion of dining room.  A one-story addition will be built on the west side of the house off the existing dining room.  There will be a crawl space beneath (rather than a full basement) and a sunporch above (with access from the second floor).  The expanded dining room will be able to comfortably seat all chapter members during a formal dinner.  
Recent photo of the dining room expansion area.  
The cinderblock walls for the crawl space are finished. 
The posts in the middle are the piers that will hold up the floor.

3) Three-story addition, plus basement, added to south wing of house.  The addition will add more student rooms, increasing capacity from 65 to 90, a large chapter room, expanded kitchen storage, and expanded cold dorm (sleeping space).

Here's the rundown by floor:

Basement
Renovation: Demolition of two gross/moldy shower rooms at the base of the stairs; conversion to nice bathroom.  Conversion of chapter room into additional study space.  Addition of separate HVAC unit for dining room.  Conversion of student rooms to large, dorm-style bathrooms and laundry room with built-in folding tables.  New carpet and paint throughout, including the guest room.   
Expansion: Addition of four student rooms.
Recent demo of gross/moldy bathrooms in basement.


First Floor
Renovation: New entryway flooring.  Repainting/makeover of "cheetah" bathroom (small half-bath).  New paint and carpet in formal, card room, library.  Expansion of kitchenette (kitchen space for students), including new counters, cabinets, sink, addition of ice and milk machines.  Remodeled handicapped-accessible bathroom.  Expansion of house director's suite, including addition of kitchenette & washer/dryer.  Refinishing of dining room hardwood floors plus new paint.  
Expansion: Expanded dining room (big enough to seat all chapter members).  New rear exit from stairwell.  Addition of new chapter room (big enough to hold all chapter members).  New HVAC unit for addition.  Expanded kitchen storage & shipping/receiving space and entryway.  New utility/housekeeping closet.

Second Floor
Renovation: New paint and carpet throughout.  New flooring in president's bathroom.  Cable TV added to student rooms.  
Expansion: Sun porch above dining room expansion.  Four student rooms.  New utility closet.

Third Floor
Renovation: New paint and carpet throughout.  New flooring in cold dorm.
Expansion: Extended cold dorm.